
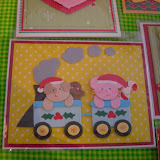
Merry Christmas !
Sorry, I didn't get a chance to post up pictures of the tags. I used them all up, again. Everything seem to creep up on me this year. Not enough time to do the things I wanted and was supposed to do. I hope to have more time to post new things soon.
Hope your Christmas is filled with family, friends, peace,laughter and good food!
Wishing you health, wealth and creativity in the New Year!
Mele Kalikimaka ~ Hauoli Makahiki Hou
Tuesday
Monday
Wrapping up the YEAR!
Sorry about not posting, but I've been busy at work and haven't had too much time to play. I did get together with a couple of friends and had a tag making session which was inspiring and fun just being together and gabbing. I should have taken pictures, but I forgot and they are gone. I will be making more this week, so I will post as soon as possible. The next few days will be devoted to my yearly Christmas Baking Marathon, but I will get to it soon. There seems to be so much to finish!
Saturday
Mixed up BUT you get the gist of it....
Sorry about the photo not matching the words, but I will have it straightened out as soon as Courtney has some time. I dunno how to fix it.


Push Pull Card
This is the card I was working on at the Original Rubber Stamp Convention. I finally finished it along with the smaller doggy card. I will get to a tutorial on this as soon as possible. Also pictured are some ATC card holders, but I use them for gift cards holders and the Jelli tag using the super-size Jelli stencil.
Last Show for 2007 -Krafty Delites-

This is the last show for Tiki and me! Tiki will be bringing her Christmas shirts, stamps, new stencils and her 2008 Calendar, free with $25.00 purchase. Hope you can make it to Krafty Delites at the Carson Community Center, Sunday, December 2nd from 10-4.
Carson Community Center
801 E. Carson Street
Carson, CA 90745
Wheelchair/walker access 9:30AM
Wednesday
Random Sample Cards
I have collected some more random sample cards of not so good quality, but I thought I would share.
Click to view on Picasa
Click to view on Picasa
 |
| Random Cards |
Tuesday
Original Stamp Convention-Carson, CA
These sample cards are from the demo boards Tiki brought from Hawaii. I wish I had more time to take pictures of them all, but was busy! Thanks to everyone that came out to see us. I will put the "push pull card" on the site as soon as possible. Need to take some clearer photos. Our next and last show will be Krafty Delites at the Carson Community Center on December 2nd.
 |
| Original Stamp Convention Demo Cards 11-07 |
Click on the above card to view sample cards on Picasa.
Monday
Stencils-Set 8 October 2007
Hope you were able to do some early shopping at Krafty Delites! The show was crowded with lots of new vendors and merchandise. Tiki brought some new designs to the show and was able to bring three out of her 8 new released designs. She will bring all sixteen of them to the Rubber Stamp Convention, November 9th and 10th. Get there early, they tend to sell fast. The prices of stencils have gone up $1.00 apiece. Unfortunately, manufacturing and shipping cost have driven prices up.
Here are the new stencils. People have asked Tiki to make her characters "super sized" for scrapbooking, but I think they would look adorable on a card or by tracing them onto shrink plastic for some cute dangling charms. Gift tags, bag toppers and accordion books would be cute too! Oh my, all the things you could create!
She has some new T-shirt designs also. Rainbow Shaved Ice, Pig Out, Pineapple Kids, and her Christmas shirt. All of course adorable.
Taj of Honolulu will be at Asian Flair, but Tiki nor I will be attending.
Sunday, November 4th, 2007 (10am - 3pm)
Cypress Community Center
5700 Orange Avenue
Cypress
This is the original site for Asian Flair. I am getting this info second hand, so please confirm before heading out there! There won't be any new stencils at this fair. Tiki took her new ones home.
Click here to see her stencils at Picasa.
 |
| Set 8 Stencils October-20 |
Tuesday
New Christmas T-shirt!

Taj of Honolulu will be at Krafty Delites Sunday, October 21st.
Carson Community Center
801 E. Carson Street
10am-4pm
The Christmas shirt comes in white, lime green and red. So cute.
Sunday
Need a Sample Image Embossed?
If you would like a particular image to be embossed or a sample made with a certain image, please comment or email me and I will try to post one ASAP. I can search my archives of fuzzy pictures or try to emboss or stamp one for you. Just be sure to include the number of the stencil. Each stencil is etched with a number and letter. dtakakuwa at gmail dot com
Thursday
New Samples from Hawaii


I know I said I would get better at taking photos of Tiki's sample cards.... I will eventually, but for now bear with me and you get the gist of the idea for the cards. Gives you some inspiration for Halloween albeit a little fuzzy. They are so cute and obviously cuter in person. Krafty Delites is on October 21st and I am not sure if she will be bringing this particular sample board. I brought her new T-shirts back down from San Jose and will take pictures of them and post next week. Until then, check out the fuzzy pictures and comment or email me any questions you have. I have some other sample cards that I will post next week also. Yes, they are just as fuzzy.
San Jose 2007
 Tiki-owner and artist of Taj, her daughter Taryn, Tiki's friends from San Jose, Vicky and Gary.
 Tiki, Taryn, my traveling buddy, Vicki and me.
 Jayne, Karen, Elaine and Rosie. Jayne and Rosie are from Judi-Kins - Elaine is the owner of Carmen's Veranda and her friend Karen.
Contact Elaine for information about Carmen's Veranda at the above link.
 Me, Vicki and Gayle from Judi-Kins at dinner at Tao Tao in Sunnyvale after the show.
 We had time to visit the wharf in San Francisco. Boudin's for the bread and Alioto's for dinner.
Original Stamp Convention-San Jose, California
I will be meeting Tiki up in San Jose for the Original Stamp Convention in San Jose. I have never been to this show so I am hoping to see some new vendors. If you have any questions or need to contact me, I will have an internet connect and a laptop. I will post some of my trip pictures ASAP.
Tuesday
Double Happiness Panda

Using black Lasting Impressions paper is the easiest because the back is white. Emboss pieces as shown.

I glue the body of the panda down with Judikin's Trio tape. Use foam tape to adhere the head.

Emboss the tiny ears and trim close to the embossed edges. Use foam tape to adhere to the panda's face.

I used Souffle pens for the eyes, nose, and mouth.


A Great Gift


A couple of weeks ago, my friend Vicki had a block garage sale. Not everyone participates, but enough so that it makes it worthwhile to park the car and shop! If you know me, you know I hate to shop, but her neighbors are so friendly and it makes for a fun day, shopping. My first stop was at Barbara's house. She had only a few items left, but one was a treasure for me! A small orange pot with a lid, heavy as all heck and looked very much like a very expensive LeCreuset piece. It was very carefully taped together with masking tape and marked, $3.00 in Barbara's special hand. I knew I had to have it especially for making gravy. I got my wallet out to pay Barb, but she refused the money. What a great gift. I argued, she bartered. Handmade cards for the wonderful gravy pot. So, here are two of those "bartered" cards. Thanks Vicki and Barbara! What a fun day.
Wednesday
Rolling (Penny) Card

You will need cardstock, Pop Dots, penny, foam tape, craft knife and a straight edge. I use the Pop Dots made by Plaid that are 1/2" by 1/8" thick. Don't try cutting out a dot by hand because the edges of the dot has to be smooth to roll correctly.

Figure out where you would like your image to roll. Position the slot so the image will roll within the boundaries of your card. Now draw a "slot" the width of your Pop Dot (1/2") and round the ends so it looks finished. Carefully cut the slot with an Exacto as smoothly as you can. I use a metal straight edge as a guide and stop short of the ends and then freehand cut the rounded part.

Cut another piece of cardstock the width just below the cut edge of the slot to the bottom of your card. This piece will not show so it can be any scrap paper. This will be a support piece for the "rolling penny." I find that using this support backing helps the penny roll more consistently. You can also attach the support piece to the front of your card if you want, let's say a blue horizon and a green foundation. Cut blue cardstock for your slot and add a green support piece to the front.

You can't tell by the picture but the support backing is just below the slot. Glue the support backing onto the back of the slotted piece.

Attach foam tape to the back of the slotted piece. Note the placement of the tape. Don't get too close to the slot! This will stop the penny from rolling. You want to be generous with the tape too because the slotted front of the card will collapse if you don't and will not leave room for the penny to roll. Adhere the Pop Dot to the middle of your penny and lay the penny down in the slot as shown. I find that putting the Pop Dot right in the center is the best. Trying to give you lots of hints from the mistakes I made which were plenty!
 Cut out an image and adhere to the penny. Check to see if it rolls correctly. Sometimes I have to use scissors to open up the slot. Decorate the rest of your card making sure that any raised images aren't in the way of your rolling image or else it will get caught and stop! Using images that have their hands up is so cute. Looks like they are doing cartwheels. I have used Tiki's penguins, monkeys and her girls. I haven't finished this card yet, but will post it soon.

All finished! Fast and easy. Tilt the card from side to side and Jelli does cartwheels.
If the above confuses you completely, email me and I will try to answer your questions. dtakakuwa at gmail dot com
Sunday
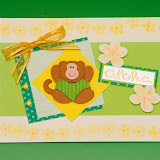
Happy Birthday Card

Every so often a group of us girls get together and have a make it-take it card party. We design two cards or projects and make enough kits for everyone to make. Last month we made a Birthday and a Friend card. I used taj's Girl's Day rubber stamps for the birthday card above.
Our little group has decided to work on a Recipe Book for the end of the year. Each person chooses two recipes and designs two pages. We then make those pages for each person in the group, exchange and bind them at our Christmas party. This year we decided to include a main dish and a side-dessert, salad, or veggie. Can't wait to see everyone's creations and recipes. Hope you to can get a group together and do the same. It seems to spark creativity and it sure is a lot of fun.
Tuesday
Demo Cards 2006
 |
| Taj Demo Cards 2006 Jon |
Saturday
Hawaiian Princess Layering Tutorial

I embossed the image onto flesh toned paper. I traced the lines in ink so it would show up better in the photo. It is not necessary to emboss every part of the image, because this is the base in which you will layer her face-arms, hair, skirt, lei and haku. Next, I cut the base out close to the embossed lines.

Emboss the face and arms again on flesh toned paper and trace in some guidelines for hair placement. I inked in her eyes and nose and used chalk for her lips and cheeks.

I used Twinkling H2O potted paints on regular white cardstock for her skirt, hair, lei and haku. After embossing, cut all the pieces out. You can see in the picture that I embossed an extra set of legs, but in the end didn't use them. I cut inbetween the individual grass pieces because I think it looks nicer, but you can either use green paper or paint the whole skirt green. Note the cutting of the skirt includes part of the arms which makes for easier placement and insures 100% coverage. Now for the layering.

Place skirt on the base matching embossed lines. I like to use Judi-kin's Trio tape. I used a marker to fill in any "white spots" behind the cut grass.

I use foam tape to place her face and arms on the base. The dimension looks nicer.

I used foam tape on her lei also.

Place her hair, matching the embossed lines on the base and face using foam tape.

Haku is next, using again, foam tape. Almost done!

I like to chalk in some of the embossed lines to add depth and emphasize some of her features. It's always fun to add a little sparkle with Stickles or Liquid Pearls.

All done! Wasn't that fun, easy and cute?
Sunday
taj mainland calendar
November 10th-11th, 2007
The Original Rubber Stamp Convention
Carson Community Center
Saturday 9-5
Sunday 10-4
Admission $5.00
$8.00 two-day pass
Krafty Delites Holiday Boutique
December 2, 2007
Carson Community Ctr.
The Original Rubber Stamp Convention
Carson Community Center
Saturday 9-5
Sunday 10-4
Admission $5.00
$8.00 two-day pass
Krafty Delites Holiday Boutique
December 2, 2007
Carson Community Ctr.
Friday
FAQs
FAQs about dry embossing, paper, tools and accessories.
These are the most common questions that are asked at my demos. If you have any questions to ask, please email me and I will add them to this list.
How do you dry emboss?
First you need a stencil, cardstock, waxed paper, embossing tool and a light box.
Place your stencil on your light box. Next place your cardstock, right side down on your stencil. Rub waxed paper on your cardstock. Start tracing! Remember you only have to trace the outline, not the inside of large areas. It's so easy and looks so amazing.
What does the waxed paper do?
By rubbing the waxed paper on your cardstock, the wax transfers and makes the cardstock slick. Your embossing tool slides across the paper a lot easier. Magic...
What brand of waxed paper do you use?
Cut-Rite in the blue box. Cut into little squares and staple. I can tear off a little sheet when I need it. One little sheet lasts a long time. You usually lose it before you need another.
What type of embossing tool is the best?

I have been using the double ended wooden handled tool for years! I invested in Fiskar's cushioned gripped embossing tool and I really like those too. They are in packs of two , with four different sized nibs. Personal preference, I think. In my early years, I remember using a dead pen and a Pyrex 8x8 baking dish with a battery operated light underneath for a light box. Sometimes on a sunny day it was the window! Crafters make do.
What brand of cardstock is used on Taj's sample boards?
The majority of the time, Lasting Impressions cardstock is used. They come in the cutest prints and are made especially for dry embossing. All their cardstock are white on the back so light can shine through for easier tracing. It's a must for dark colors.
What is the best way to cut out the embossed designs?
When I first started cutting out my embossed images, I cut exactly on the edge. It's easier that way. Later on with some practice under my belt, I started to leave a little space between the embossed image and the cut edge. It makes the embossed image really POP! I think it is personal preference also. One hint is to spin your cardstock around and not your scissors. That seems to make a neater edge. I always go back and make sure my edges are even and smooth. Most of the time they aren't, but that is okay. You have to remember it's a hand crafted item so little mistakes are always acceptable.
What brand of scissors do you use?
I like Cutter Bees by EK Success. They have a nice point, sharp, small and relatively cheap. I am sure there are better scissors out there, but I like my Cutter Bees. They have a teflon coated model, Honey Bees for cutting sticky stuff. I like that pair for cutting mounting tape and when I mount my own stamps. They are really cute too! Yellow and black. I think any sharp pointy scissors will work fine.
What brand of light box do you use ? Where did you purchase it?
The majority of the time, I use my Artograph Light Box- it has a large surface- 10"x 12" and it has a tiny tray at the top so you won't lose your embossing tool. Mine never seems to get in there though. I also have one of those small portable ones that I use in a pinch. Real handy because of its compact size. I place it on a pot holder because it heats up and warps my cutting mat.
I bought mine at Aaron Brothers with a 50% off coupon. Great deal!
What do you use to color in your embossed image if you don't use printed paper?

I like the .o1 size Zig Millennium Markers. At first, I used to place the stencil on the embossed image and pen the eyes and whiskers in, but now I just follow the raised portions and hope it comes out okay.
How do you layer the embossed image?
It still takes me awhile to figure out how to layer and cut out the pieces. It helps to follow one of Taj's samples. We always encourage people to take photos at the stamp shows and believe me, I look at them frequently. I will eventually get to some tutorials that will show how to layer the pieces. Picking out patterns and colors is up to you ! It's so hard to envision a finished piece. You can only give it a try and if it works then it works.
These are the most common questions that are asked at my demos. If you have any questions to ask, please email me and I will add them to this list.
How do you dry emboss?
First you need a stencil, cardstock, waxed paper, embossing tool and a light box.
Place your stencil on your light box. Next place your cardstock, right side down on your stencil. Rub waxed paper on your cardstock. Start tracing! Remember you only have to trace the outline, not the inside of large areas. It's so easy and looks so amazing.
What does the waxed paper do?
By rubbing the waxed paper on your cardstock, the wax transfers and makes the cardstock slick. Your embossing tool slides across the paper a lot easier. Magic...
What brand of waxed paper do you use?
Cut-Rite in the blue box. Cut into little squares and staple. I can tear off a little sheet when I need it. One little sheet lasts a long time. You usually lose it before you need another.
What type of embossing tool is the best?
I have been using the double ended wooden handled tool for years! I invested in Fiskar's cushioned gripped embossing tool and I really like those too. They are in packs of two , with four different sized nibs. Personal preference, I think. In my early years, I remember using a dead pen and a Pyrex 8x8 baking dish with a battery operated light underneath for a light box. Sometimes on a sunny day it was the window! Crafters make do.
What brand of cardstock is used on Taj's sample boards?
The majority of the time, Lasting Impressions cardstock is used. They come in the cutest prints and are made especially for dry embossing. All their cardstock are white on the back so light can shine through for easier tracing. It's a must for dark colors.
What is the best way to cut out the embossed designs?
When I first started cutting out my embossed images, I cut exactly on the edge. It's easier that way. Later on with some practice under my belt, I started to leave a little space between the embossed image and the cut edge. It makes the embossed image really POP! I think it is personal preference also. One hint is to spin your cardstock around and not your scissors. That seems to make a neater edge. I always go back and make sure my edges are even and smooth. Most of the time they aren't, but that is okay. You have to remember it's a hand crafted item so little mistakes are always acceptable.
What brand of scissors do you use?
I like Cutter Bees by EK Success. They have a nice point, sharp, small and relatively cheap. I am sure there are better scissors out there, but I like my Cutter Bees. They have a teflon coated model, Honey Bees for cutting sticky stuff. I like that pair for cutting mounting tape and when I mount my own stamps. They are really cute too! Yellow and black. I think any sharp pointy scissors will work fine.
What brand of light box do you use ? Where did you purchase it?
The majority of the time, I use my Artograph Light Box- it has a large surface- 10"x 12" and it has a tiny tray at the top so you won't lose your embossing tool. Mine never seems to get in there though. I also have one of those small portable ones that I use in a pinch. Real handy because of its compact size. I place it on a pot holder because it heats up and warps my cutting mat.
I bought mine at Aaron Brothers with a 50% off coupon. Great deal!
What do you use to color in your embossed image if you don't use printed paper?


My favorites are chalks, Twinkling H2O's and markers.
What do you use to pen in whiskers and eyes?
I like the .o1 size Zig Millennium Markers. At first, I used to place the stencil on the embossed image and pen the eyes and whiskers in, but now I just follow the raised portions and hope it comes out okay.
How do you layer the embossed image?
It still takes me awhile to figure out how to layer and cut out the pieces. It helps to follow one of Taj's samples. We always encourage people to take photos at the stamp shows and believe me, I look at them frequently. I will eventually get to some tutorials that will show how to layer the pieces. Picking out patterns and colors is up to you ! It's so hard to envision a finished piece. You can only give it a try and if it works then it works.
Subscribe to:
Posts (Atom)